Thursday, March 29, 2012

Stitching the hulls

We have been working on the boat since last June and today we are finally done with Sheet 1 of the plans! The hulls are now stitched together and ready for the bulkheads just in time for the warmer weather. We are pretty far along with other bits and pieces but we still haven't seen anything that looks like a boat, until today.

But before starting to stitch, we found mistake #3 with the bow panels. We made the top side too long which means the stem wouldn't fit. Something about the measurements on the plans didn't add up because the measurement from the edge of the ply was right, but the measurement from the bulkhead was wrong. You can see that we have to take off a small triangle from the front which was pretty easy with the pull saw, then used a chisel to bevel the edge of the butt block.


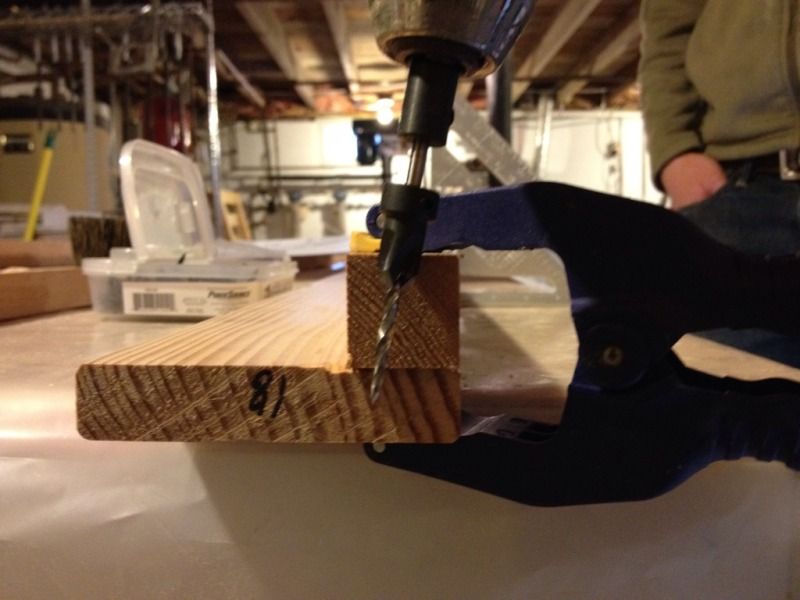
We also drilled the rudder lashing holes on the drill press before attaching the aft stems. These were a bit messy for our taste and so the next ones were done with a piece of wood clamped to the drill press table as a fence to keep the holes more neatly aligned.


And then it was time to start putting in stitches of copper wire! Here are the stitches along the bow. You can see how narrow the filler piece is now that we cut it down. The stitches in that area go through the main hull panel so we don't rip open that seam when the hulls are opened out.


We then stitched the aft stem and keel.


We couldn't help but open it up with one bulkhead and see what it will look like.


Check it out, it's a boat!


The bulkheads are just fit loose for now to see how they fit and if the stitches are the right tension. We will probably need to loosen the stitches along the keel to make sure it isn't twisted. Each additional bulkhead makes the shape prettier and prettier.


Unfortunately we will probably put the stitched hulls aside and go back to the beams and other small pieces while we wait for the fiberglass tape to be delivered and for a warm weekend day. Our plan is to do all the epoxy, fillets and fiberglass tape in one continuous process. It won't be this weekend and it won't be next weekend so perhaps the weekend after we'll have some glued up hulls.

Monday, March 12, 2012

Sheer stringers and more clamps

One thing we have learned is that gluing one floppy thing to another floppy thing means you're going to need a ton of clamps. Not wanting to spend the money on 30 or 40 spring clamps we went with the PVC clamp method.


It started with spending way too much time cutting 1" sections of 2" PVC pipe with a pull saw, then taking a short cut and using the circular saw, then realizing you have created a 10' radius of PVC chips in the yard and then finally shop-vac'ing your lawn to get it all cleaned up. But in the end we had plenty of clamps to get the hull sides ready for stitching.

Boston has finally warmed up enough that we can work outside again which was a treat after all that gluing in the basement. The stringers are held with the clamps and a few staples from the underside to keep them from sliding around. We also glued on the doubling blocks which go at the lashing points for the beams and mast stays.


We also glued the small extension on our replacement bow panels that we couldn't glue before while we had the chance. When these are dry we don't want anything to keep us from stitching up the hulls.


Here is hull side #2 sunning and hull side #3 glued and clamped up. By this point we have given each panel a final home as to which side of which hull they will become. Only the outside face of each hull gets the supports for the mast rigging so we put the two panels with the roughest seams on the inside where they will only be seen by the fishes.


The forecast says rain tomorrow morning but sun again in the afternoon so that should be enough of a window to glue the last hull side.

Sunday, March 11, 2012

Mast gluing and details

There are a couple of small details that need to be taken care of so we can get to gluing. The mast foot is already shaped so that end is done but the top end of the mast needs some attention.

Here are the two masthead sheaves nearing completion. The grooves were shaped with a rat tail file and a little patience. all told these took about 20 minutes.


A test fit with 1/4" line which is size of the future main and jib halyards (halyard = rope that pulls up a sail).


The plans call for a space between the sheaves but didn't specify what so here is our answer: a 1/8" thick piece of douglas fir ripped on the table saw from some beam scraps. The two sides of are coated in epoxy since they will be hard to reach.

The whole unit is then glued together and ready to drop into corresponding cutouts in the mast halves.


We don't need these quite yet, but right to left shows the process or making the thumb cleats which will hold the stays at the top of the mast. The grain is oriented parallel to the outside edge for maximum strength even though the stays will be pulling toward the mast and downward. Who knows one day someone, probably me,f may try raising the mast by pulling on one and I'd like them to not break.


Which all lead up to the big event of gluing and clamping the mast halves together. I have quadrupled my army of bar clamps but still don't have as many as I would have liked for this job.


All told it came out nicely though and it's good to have the spars roughed out and ready for finishing when the rest of the boat is farther along. We're still waiting for the day when we have something that looks like a boat, hopefully that day will be here soon.

Saturday, March 10, 2012

8-Siding the Mast and adding fillets

The mast halves have cured and were run through the table saw with the blade at 45 degrees to get down to eight sides. The mast foot fits into recesses cut into two halves and here is the rough fit.


The next step is to support the inside corners of what is essentially a rounded box section with epoxy fillets mixed with 50/50 colloidal silica and micro balloons. There will be a lot of fillets when we get to the hulls (soon!) so this is good practice.


Filler blocks are used to make the mast solid at the ends where the foot and sheaves are supported. The plans call for 1/2" ply but we had 1 1/2" x 1/2" fir scraps so we're using those instead which should be stronger and lighter. To reduce stress points from the sudden change in stiffness at the filler pieces we used the excess epoxy mix to taper the transition.


When we're happy with all the fillets we leave the mast halves to cure.


The recesses for the foot are done, the recess for the masthead sheaves will be next and then we can glue the mast halves together and put it aside until later for the final finishing.

Sunday, March 4, 2012

Gluing the mast halves

Yesterday I rounded the edges on the sprit with a router which means the gluing table is clear so now we can work on the mast. The plans call for a box section with epoxy fillets which is then rounded using the normal progression of 4-sided to 8-sided to 16-sided to round. 

The first step is to make the two 'U' shaped halves, insert the mast foot and halyard sheaves and then glue the two halves together. Wharram suggests using screws to temporarily clamp the square pieces onto the larger flat pieces then remove and fill with thickened epoxy. Here is our plan to avoid screw holes showing in the final piece, though we ended up angling the screw to provide more depth.


The last thing we want is for the fir to split so each screw location s pre-drilled with a countersink bit. Here is the bit set for the right depth and the angle we decided to use.


To get the spacing right we used 1 1/2" wide cutoffs as spacer blocks. the square pieces are 1" square so that makes a 3 1/2" diameter mast.


Once both halves were aligned and screwed we could back out the screws, coat epoxy and then re-assemble.  It was a long day but getting the spars done will be a huge landmark on the way to sailing this spring.


Friday, March 2, 2012

Assembling the mast foot

Wharram uses a foot on the bottom of the mast and cleats on the cross beam to easily locate and establishes the rake of the mast. The mast foot also holds the cleats for the jib and main halyards as well as the mains'l downhaul.

The Hitia 17 uses two layers of 1/2" plywood for the foot, here the is the outline for one half drawn out on the plywood. You can see that the top of the cross beam is doubled where the mast steps and that a rounded block is added to the aft face which allows you to hook and then rotate the mast into place.


Here it is cut out including shaping the opening where the down-haul line runs down through the foot and back up to gain more purchase when tensioning the luff of the sail.


Next the two halves are epoxied together and clamped while keeping all the edges aligned.

Extra epoxy and wood flour mix is spread around the down-haul hole to make sure that the plywood is protected from any abrasion.


Once it dries it will be ready to glue between the two mast halves during final mast assembly.