Sunday, September 11, 2011

Sanding and gluing

We had hoped that this would be the day to get the hulls ready for stitching but that was not to be. The day started with a trip to the store for 80 grit sandpaper and sanding the insides of the hulls.


The sanding seemed to take forever, but by lunch time all the hull panels were done.


Finally time to start gluing!! We cut up some scrap pieces of spruce from my oar project to make drywall screw clamps. the bottoms get a piece of tape to release from the epoxy. You definitely want to make sure you have enough ready BEFORE you start gluing.


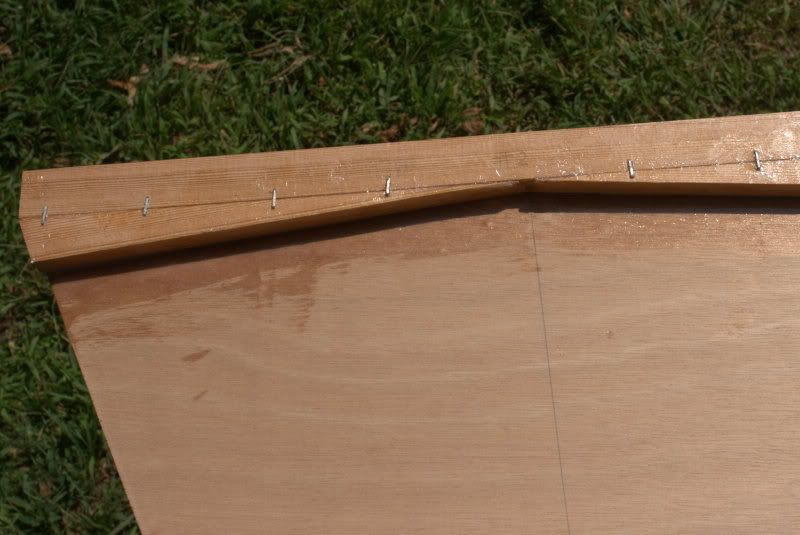
The gluing surfaces, including the butt block, get a coat of raw epoxy. Once the epoxy went tacky we mixed up epoxy with milled glass and silica to mayonnaise consistency and slathered up the butt blocks.


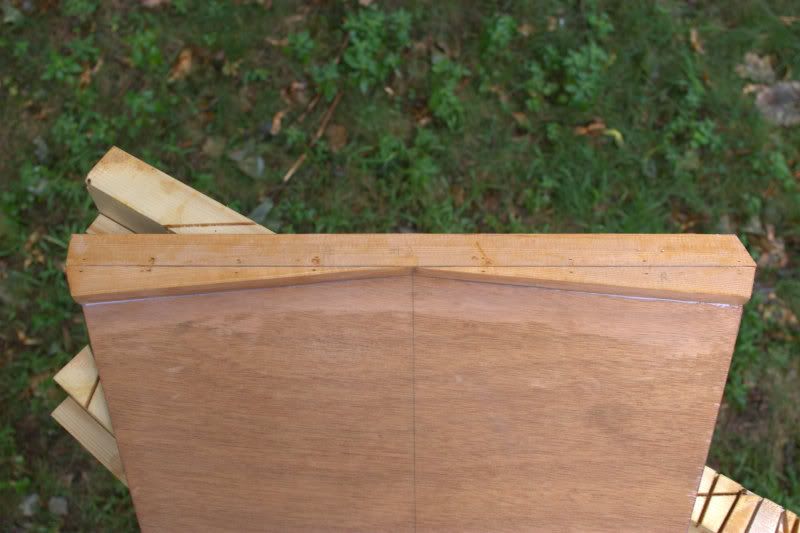
Here it is clamped in place with the screws and wood clamping washers. I later added a spring clamp here and there to help along the edges.

It looks like everything is flush, we'll see when the screws come out tomorrow. I've learned my lesson about waiting too long to scrape off the excess glue, so I'll be checking in regularly to see when they are ready.


We only had time to do two hull panels, so from now on one hull may be a step ahead of the other.

Saturday, September 10, 2011

An early end to my sailing season

Last weekend, after a nice morning of working on the Hitia's bulkheads, I took my wife out on our sailing dinghy named Tipsy.


Here is the beach that we usually launch from, this was a much calmer day.


The wind was a good 12-14 knots and it was some exiting sailing until we broke a lee board and then very soon after broke the other. That left us trying to sail home (straight upwind) with no foils and making a tremendous amount of leeway. I was very glad to have a set of oars on board to row home, even if they were the dinky 5' pair that came with the boat.


It was so stressed that the ply layers separated down by the tip!


They were just a piece of 1/2" plywood with mitered edges, nothing fancy or efficient so I wanted to make new foils anyway. So now i have two projects moving to the top of the pile for the winter: make a nice pair of foils and finish the pair of 8' oars I have glued up.

Tuesday, September 6, 2011

Improved deck supports

The deck curve at bulkhead #2 is a full 1" which means that our 1" wide deck supports would be too thin on the ends to offer any support. You see the outline of the 1" support against the curve at the top of the bulkhead here.


I could have just added a strip at the bottom to make the whole piece taller, but I thought i would do something a little stronger and lighter. I actually gave the solution away in the first photo, it's the triangular pieces on the far right. They will fit below the full length strip making the whole piece about 1" thick and orienting the grain properly at the edges. Not as fancy as laminating up a curved support but more than enough for a stitch-and-glue beach cat.

I started by marking out the shape on a scrap strip of the 1" x 1/2" fir.


I wasn't sure how to cut this at first, but finally decided to just do it by hand with my new Japanese pull saw. The more I use that saw the more I think power tools are over rated.


And here it is all glued up and again held with staples. Staples aren't the prettiest, but it worked and it's all going to be painted later anyway.


Finally, here it is with the glue dried and two coats of epoxy.


One more afternoon of glueing and all the bulkheads will be assembled and coated. I'll trim the top edges on the router table and they'll be ready for stitching into the hulls.

Sunday, September 4, 2011

Deck and floor supports

It's a beautiful day and I'm long overdue for an afternoon of sailing, but first time to keep moving forward on the Wharram. It seems like a good day to glue the support pieces on some of the bulkheads so lets get to it.

The deck and bulkhead supports are made of the 1" x 1/2" fir we ripped earlier. Each one was measured against the bulkhead and then cut to length. Here they all are labeled and ready to go.


I only have the saw horse space (and motivation) to do bulkheads 1, 3 and 6. The bulkheads and fir strips are laid out and the gluing surfaces coated with raw epoxy.


The strips are coated with thickened epoxy and pressed into place.


Wharram suggests temporarily clamping with nails, but I'm afraid the fir would split and I don't have any drywall screws short enough so I used staples instead.


Once the glue is firmed up I'll scrape out the excess and probably give the unfinished sides their two coats of epoxy.


My little dinghy is getting jealous of all the attention spend on this new bigger boat, so now I'm off to the beach to take her for a quick sail.