Wharram seems to like interesting mast steps, and the Hitia 17 is no different. The mast as feet that lock it to the beam fore and aft and "locating chocks" that locate the base of the mast laterally. The front block also prevents the mast from rotating and the middle portion gives a curved initial contact point for the foot of the mast to hook onto as the mast is rotated up into place.
So here is the plan for the front block, I have made it a bit wider than the sketch which I think looks better and will give more epoxy surface area to prevent shearing along the glue joint.
Now the mast step doubling block and the block are epoxied on. The sequence here was fillets, doubling block then mast foot block.
The block liked to slide around particularly with the clamps on the angled faces. It took some adjusting but eventually it sat centered and flush with the top surface.
Now that the epoxy has cured it's time to make sure the proportions and shapes look right.
Overall I'd say the mast step is looking pretty good and I seem to be getting the hang of the fillets. The second round worked out much neater than the first though you can see that i need to go back and clean up some of the excess.
We're still struggling to find a free day with good weather to do the hulls, but they are poised and waiting should the opportunity arise.
This blog will document the construction and sailing adventures of a Hitia 17 beach cruising catamaran designed by James Wharram.
Showing posts with label Fir. Show all posts
Friday, May 11, 2012
Thursday, May 10, 2012
Continuing on the main beam
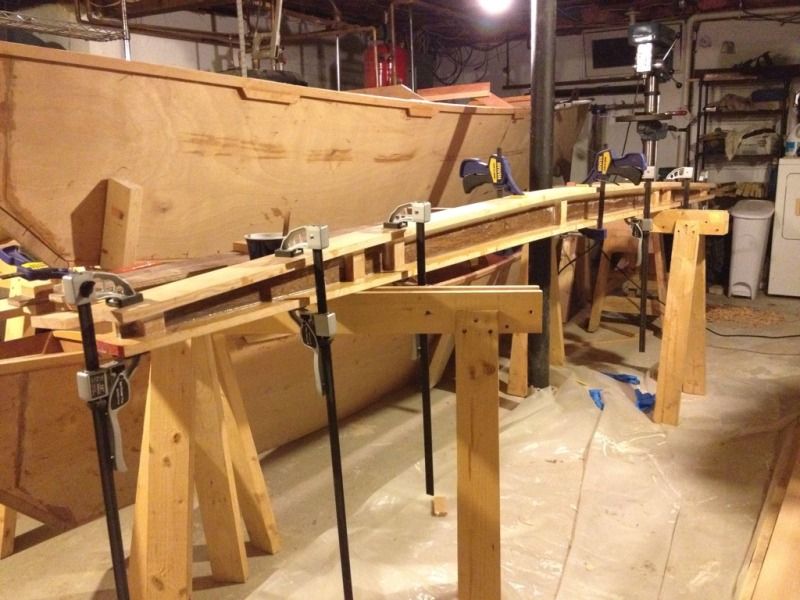
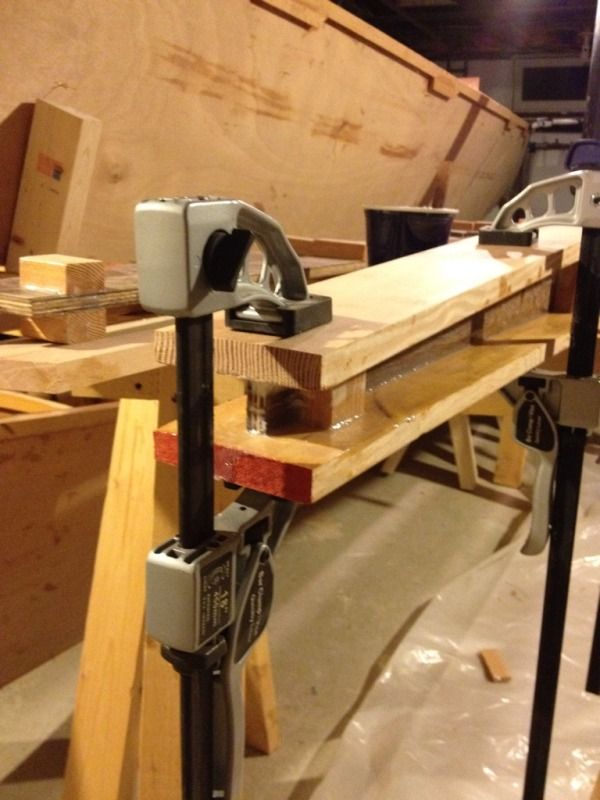
A quick update on the main beam. The bottom was glued on and cured over night.
The compression blocks pretty much assure that it the top and bottom are parallel, though in some cases there was some room for adjustment based on small changes in the clamping location particularly on the ends.
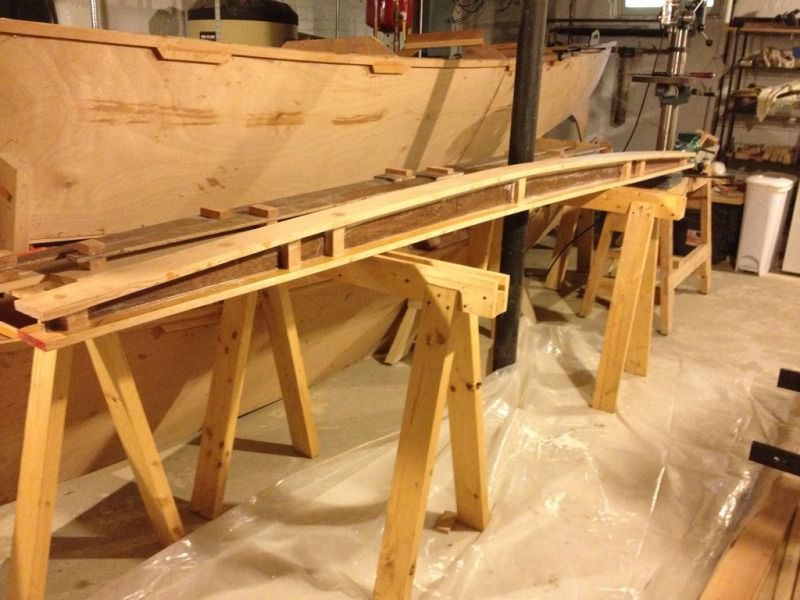
And here is the main beam all glued up and man is this thing sturdy. I'm feeling better about these beams being the only thing keeping us out of the water.
Now we just have to keep up the sequence: glue, wait, fillet, wait, glue, wait, fillet, wait ...
The compression blocks pretty much assure that it the top and bottom are parallel, though in some cases there was some room for adjustment based on small changes in the clamping location particularly on the ends.
And here is the main beam all glued up and man is this thing sturdy. I'm feeling better about these beams being the only thing keeping us out of the water.
Now we just have to keep up the sequence: glue, wait, fillet, wait, glue, wait, fillet, wait ...
Wednesday, May 9, 2012
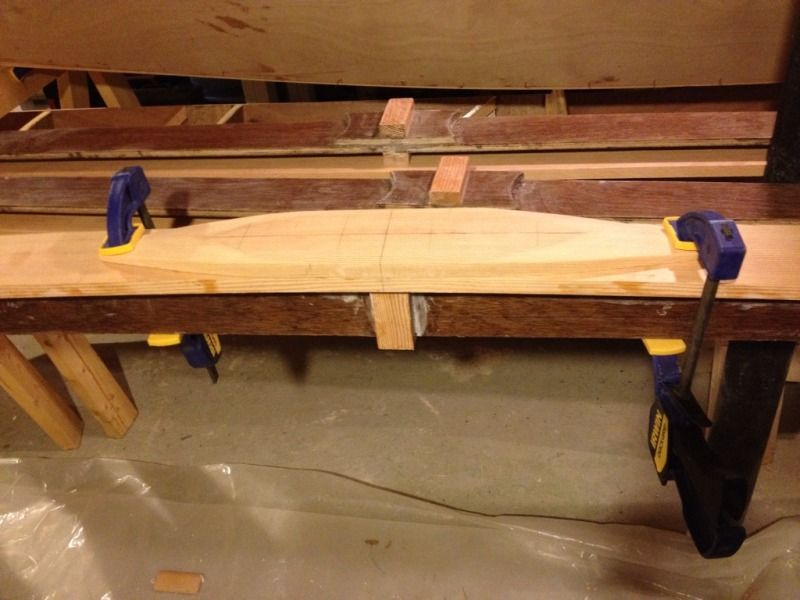
Carving the mast step block
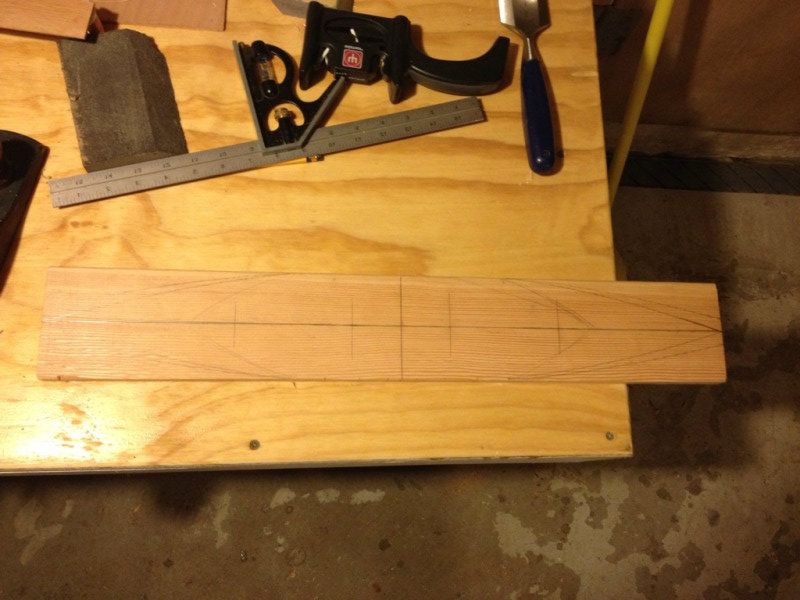
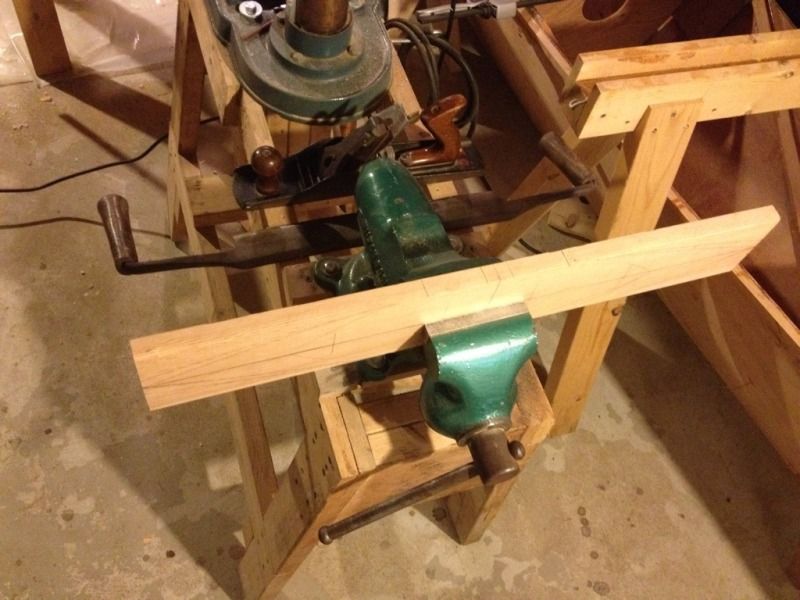
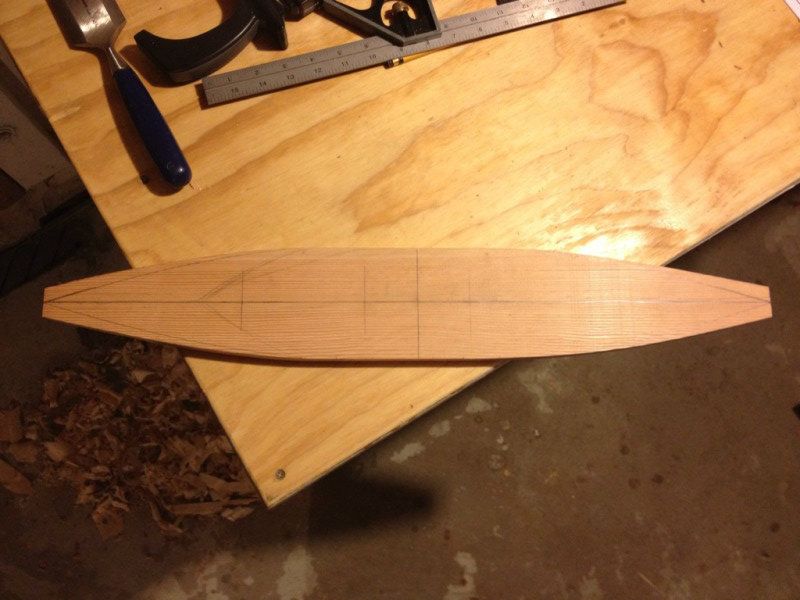
Another rainy day working in the basement instead of outside, but I made some progress on the mast step for the main beam. The top of the main beam is doubled up under the mast step with a block that tapers on each end "to a pleasing shape" according to the plans. I marked a shape that looked good on a cutoff and got to shaping. At first I thought I would bring the edges to a point, but then decided to leave the edge flat at about an inch wide.
I've recently found how much I like working with an old draw knife I picked up a long time ago and this was another good use for it. It's 14" along the blade and 24" between the handles so a bit big but very handy.
In no time at all the blank was worked down to shape and then planed to the lines.
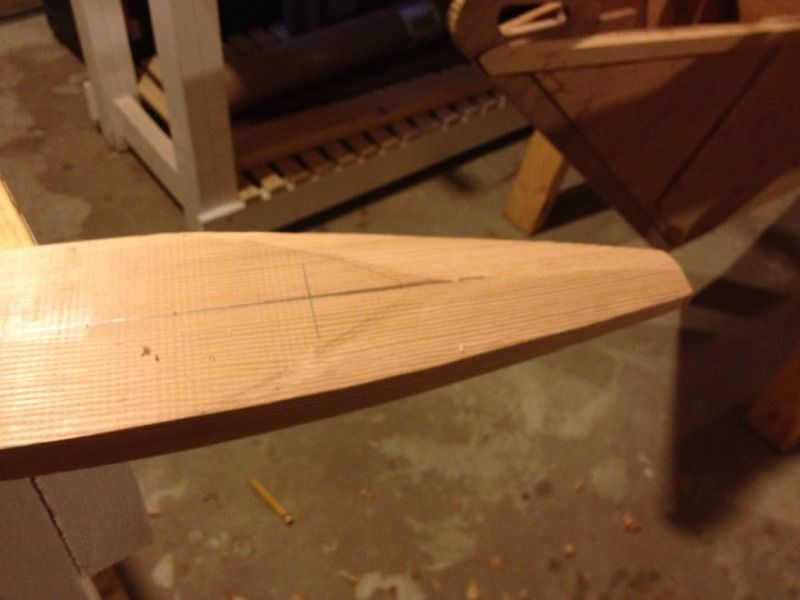
The next step was to taper and bevel the edges to lighten up the appearance of the mast step block. The top edge of the bevel was drawn on freehand to miss the blocks that form the step so that they have a flat mounting surface. The rest was trimmed down by eye with the draw knife.
Here it is getting pretty close to the final shape, but not quite even. This was all with the draw knife so far.
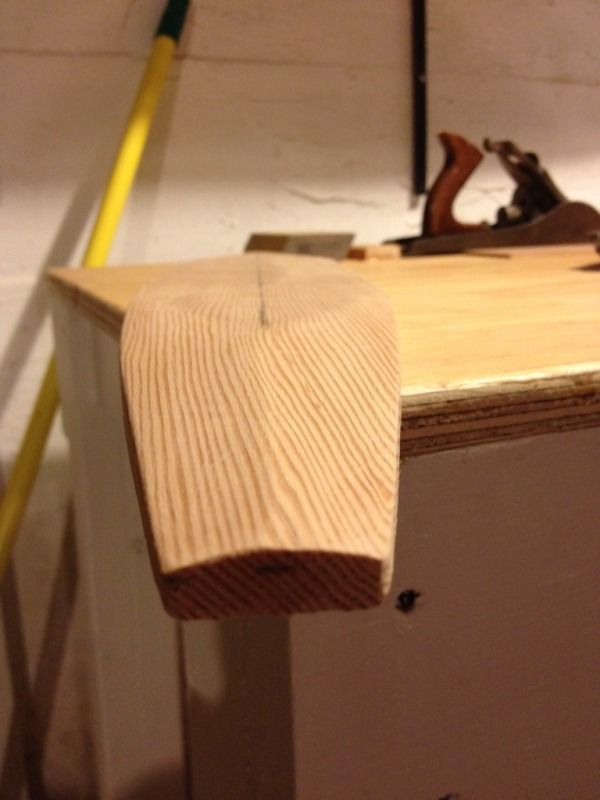
A bit more work with a sanding block and it was done and ready for a test fit. The short piece didn't want to take the bend but eventually settled in nicely. I'm happy with how the tapered ends turned out and how they flow with the curve of the beam.
I've recently found how much I like working with an old draw knife I picked up a long time ago and this was another good use for it. It's 14" along the blade and 24" between the handles so a bit big but very handy.
In no time at all the blank was worked down to shape and then planed to the lines.
The next step was to taper and bevel the edges to lighten up the appearance of the mast step block. The top edge of the bevel was drawn on freehand to miss the blocks that form the step so that they have a flat mounting surface. The rest was trimmed down by eye with the draw knife.
Here it is getting pretty close to the final shape, but not quite even. This was all with the draw knife so far.
A bit more work with a sanding block and it was done and ready for a test fit. The short piece didn't want to take the bend but eventually settled in nicely. I'm happy with how the tapered ends turned out and how they flow with the curve of the beam.
That's it for now on the mast step until the bottom of the beam is glued on. This beam is getting pretty close to done, two more to go.
Saturday, April 28, 2012
Diagonal hull stiffeners
The next step after stitching in the bulkheads is to add diagonal stiffeners to brace the thin hull panels. The diagonals go on the two fore sections and the one aft section of hull. The middle sections get their bracing from the floor structure. Here is a diagram showing the diagonal bracing in bright green and how it ties the keel and stem structure up to the sheer.
I cut each piece to fit and then made sure I had scraps the right length to use as bracing. Everything went smoothly in the test fit so I moved on to gluing. Funny how everything seems to stop going according to plan once you slather on the epoxy.
The epoxy got rid of the stiffener to hull friction so the clamping pressure kept trying to slide the pieces up and out of the hull. Adding staples or clamps near the sheer fixed the problem. The plans call for stitching these in but we have already drilled enough holes in our hulls and the stitches wouldn't have provided enough clamping pressure anyway.
Installation started in the bow section ...
.. then the next section aft ...
... and finally the aft section.
This hull is ready for fillets! One down, one to go.
I cut each piece to fit and then made sure I had scraps the right length to use as bracing. Everything went smoothly in the test fit so I moved on to gluing. Funny how everything seems to stop going according to plan once you slather on the epoxy.
The epoxy got rid of the stiffener to hull friction so the clamping pressure kept trying to slide the pieces up and out of the hull. Adding staples or clamps near the sheer fixed the problem. The plans call for stitching these in but we have already drilled enough holes in our hulls and the stitches wouldn't have provided enough clamping pressure anyway.
Installation started in the bow section ...
.. then the next section aft ...
... and finally the aft section.
This hull is ready for fillets! One down, one to go.
Sunday, March 11, 2012
Mast gluing and details
There are a couple of small details that need to be taken care of so we can get to gluing. The mast foot is already shaped so that end is done but the top end of the mast needs some attention.
Here are the two masthead sheaves nearing completion. The grooves were shaped with a rat tail file and a little patience. all told these took about 20 minutes.
A test fit with 1/4" line which is size of the future main and jib halyards (halyard = rope that pulls up a sail).
The plans call for a space between the sheaves but didn't specify what so here is our answer: a 1/8" thick piece of douglas fir ripped on the table saw from some beam scraps. The two sides of are coated in epoxy since they will be hard to reach.
The whole unit is then glued together and ready to drop into corresponding cutouts in the mast halves.
We don't need these quite yet, but right to left shows the process or making the thumb cleats which will hold the stays at the top of the mast. The grain is oriented parallel to the outside edge for maximum strength even though the stays will be pulling toward the mast and downward. Who knows one day someone, probably me,f may try raising the mast by pulling on one and I'd like them to not break.
Which all lead up to the big event of gluing and clamping the mast halves together. I have quadrupled my army of bar clamps but still don't have as many as I would have liked for this job.
All told it came out nicely though and it's good to have the spars roughed out and ready for finishing when the rest of the boat is farther along. We're still waiting for the day when we have something that looks like a boat, hopefully that day will be here soon.
Here are the two masthead sheaves nearing completion. The grooves were shaped with a rat tail file and a little patience. all told these took about 20 minutes.
A test fit with 1/4" line which is size of the future main and jib halyards (halyard = rope that pulls up a sail).
The plans call for a space between the sheaves but didn't specify what so here is our answer: a 1/8" thick piece of douglas fir ripped on the table saw from some beam scraps. The two sides of are coated in epoxy since they will be hard to reach.
The whole unit is then glued together and ready to drop into corresponding cutouts in the mast halves.
We don't need these quite yet, but right to left shows the process or making the thumb cleats which will hold the stays at the top of the mast. The grain is oriented parallel to the outside edge for maximum strength even though the stays will be pulling toward the mast and downward. Who knows one day someone, probably me,f may try raising the mast by pulling on one and I'd like them to not break.
Which all lead up to the big event of gluing and clamping the mast halves together. I have quadrupled my army of bar clamps but still don't have as many as I would have liked for this job.
All told it came out nicely though and it's good to have the spars roughed out and ready for finishing when the rest of the boat is farther along. We're still waiting for the day when we have something that looks like a boat, hopefully that day will be here soon.
Sunday, March 4, 2012
Gluing the mast halves
Yesterday I rounded the edges on the sprit with a router which means the gluing table is clear so now we can work on the mast. The plans call for a box section with epoxy fillets which is then rounded using the normal progression of 4-sided to 8-sided to 16-sided to round.
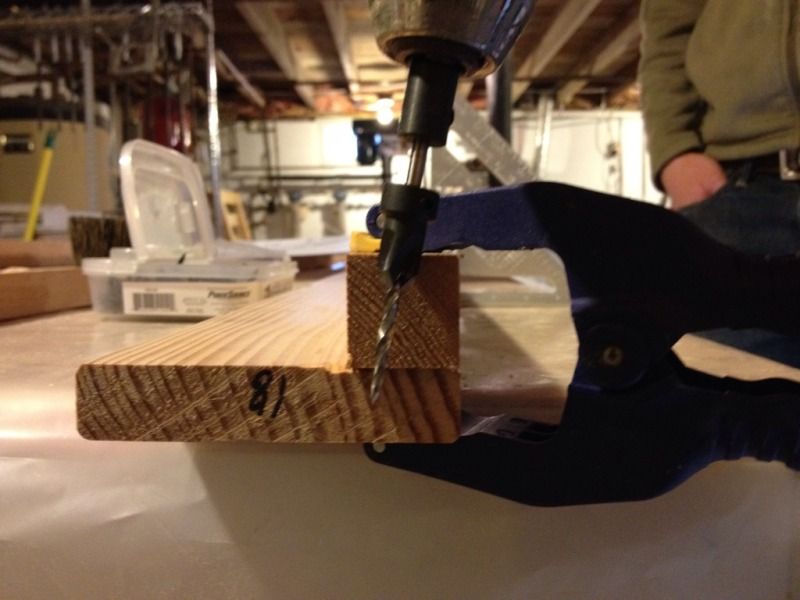
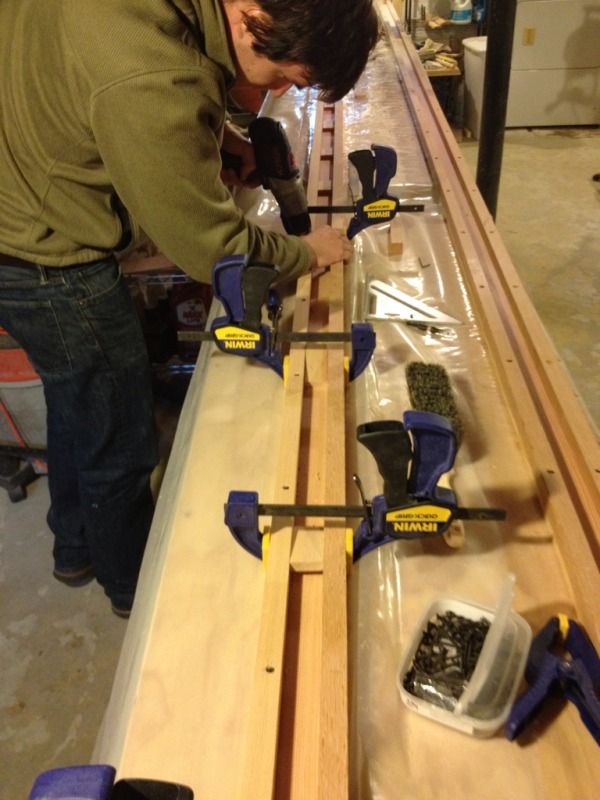
The first step is to make the two 'U' shaped halves, insert the mast foot and halyard sheaves and then glue the two halves together. Wharram suggests using screws to temporarily clamp the square pieces onto the larger flat pieces then remove and fill with thickened epoxy. Here is our plan to avoid screw holes showing in the final piece, though we ended up angling the screw to provide more depth.
The last thing we want is for the fir to split so each screw location s pre-drilled with a countersink bit. Here is the bit set for the right depth and the angle we decided to use.
To get the spacing right we used 1 1/2" wide cutoffs as spacer blocks. the square pieces are 1" square so that makes a 3 1/2" diameter mast.
Once both halves were aligned and screwed we could back out the screws, coat epoxy and then re-assemble. It was a long day but getting the spars done will be a huge landmark on the way to sailing this spring.
Tuesday, September 6, 2011
Improved deck supports
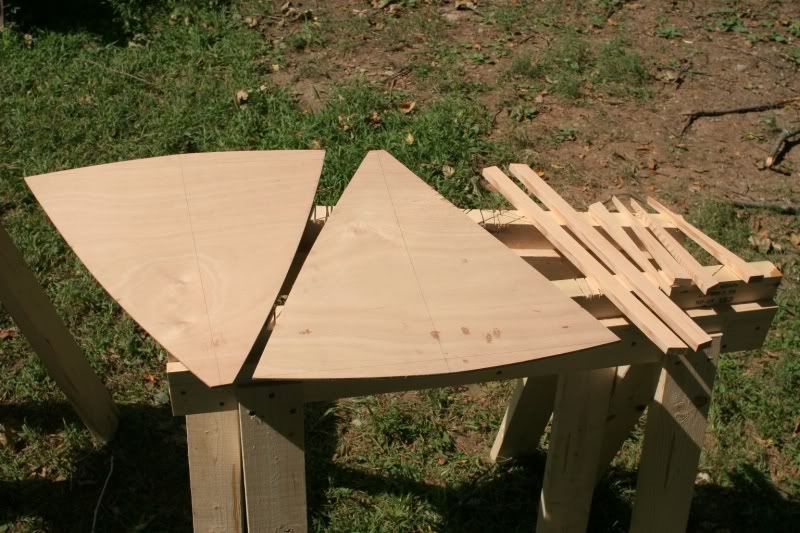
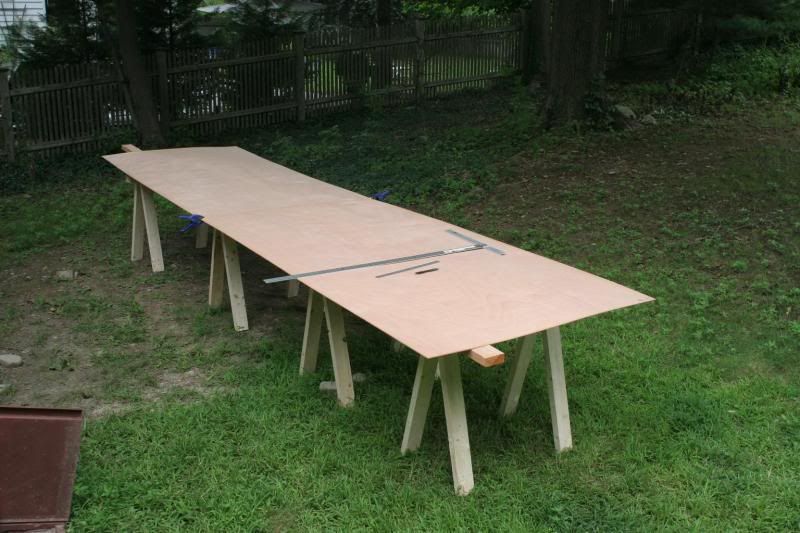
The deck curve at bulkhead #2 is a full 1" which means that our 1" wide deck supports would be too thin on the ends to offer any support. You see the outline of the 1" support against the curve at the top of the bulkhead here.
I could have just added a strip at the bottom to make the whole piece taller, but I thought i would do something a little stronger and lighter. I actually gave the solution away in the first photo, it's the triangular pieces on the far right. They will fit below the full length strip making the whole piece about 1" thick and orienting the grain properly at the edges. Not as fancy as laminating up a curved support but more than enough for a stitch-and-glue beach cat.
I started by marking out the shape on a scrap strip of the 1" x 1/2" fir.
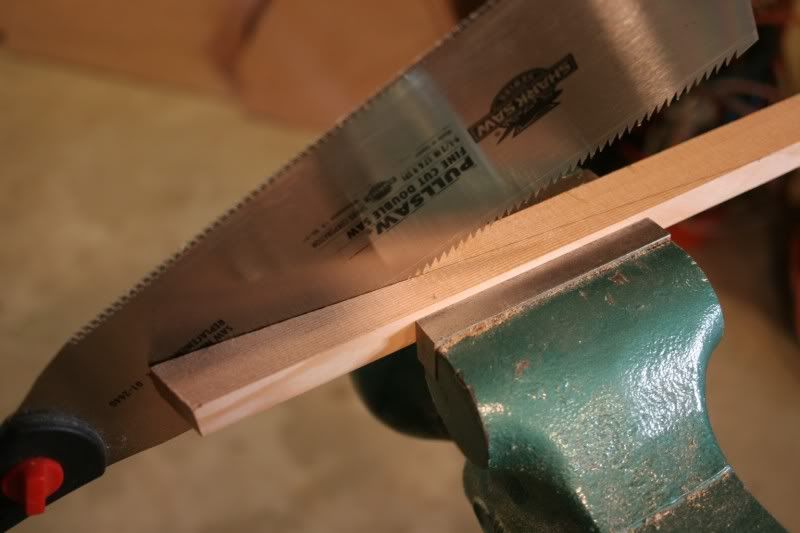
I wasn't sure how to cut this at first, but finally decided to just do it by hand with my new Japanese pull saw. The more I use that saw the more I think power tools are over rated.
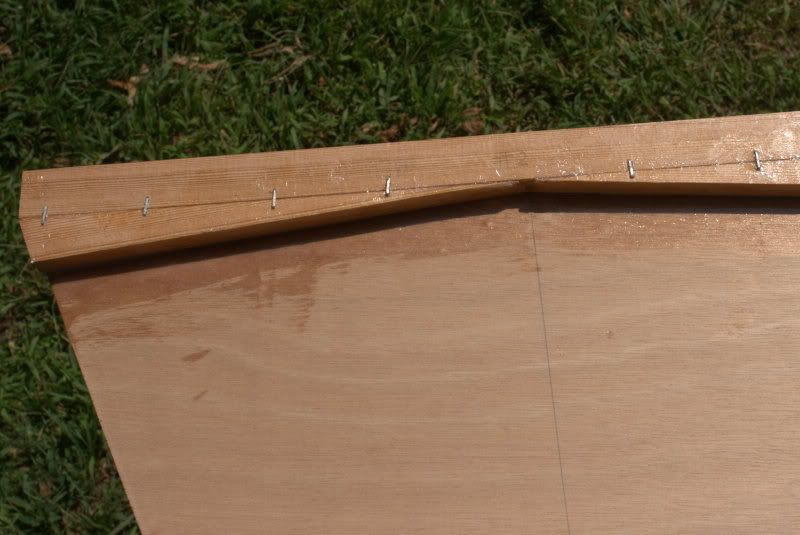
And here it is all glued up and again held with staples. Staples aren't the prettiest, but it worked and it's all going to be painted later anyway.
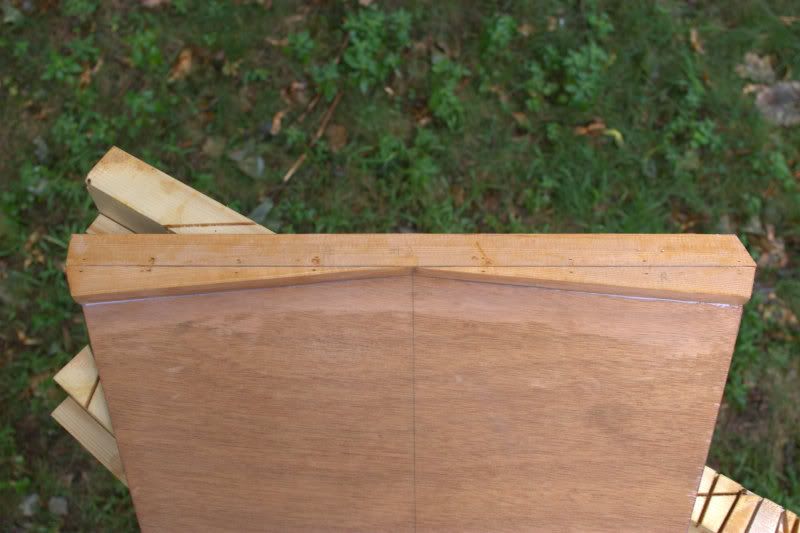
Finally, here it is with the glue dried and two coats of epoxy.
One more afternoon of glueing and all the bulkheads will be assembled and coated. I'll trim the top edges on the router table and they'll be ready for stitching into the hulls.
I could have just added a strip at the bottom to make the whole piece taller, but I thought i would do something a little stronger and lighter. I actually gave the solution away in the first photo, it's the triangular pieces on the far right. They will fit below the full length strip making the whole piece about 1" thick and orienting the grain properly at the edges. Not as fancy as laminating up a curved support but more than enough for a stitch-and-glue beach cat.
I started by marking out the shape on a scrap strip of the 1" x 1/2" fir.
I wasn't sure how to cut this at first, but finally decided to just do it by hand with my new Japanese pull saw. The more I use that saw the more I think power tools are over rated.
And here it is all glued up and again held with staples. Staples aren't the prettiest, but it worked and it's all going to be painted later anyway.
Finally, here it is with the glue dried and two coats of epoxy.
One more afternoon of glueing and all the bulkheads will be assembled and coated. I'll trim the top edges on the router table and they'll be ready for stitching into the hulls.
Sunday, September 4, 2011
Deck and floor supports
It's a beautiful day and I'm long overdue for an afternoon of sailing, but first time to keep moving forward on the Wharram. It seems like a good day to glue the support pieces on some of the bulkheads so lets get to it.
The deck and bulkhead supports are made of the 1" x 1/2" fir we ripped earlier. Each one was measured against the bulkhead and then cut to length. Here they all are labeled and ready to go.
I only have the saw horse space (and motivation) to do bulkheads 1, 3 and 6. The bulkheads and fir strips are laid out and the gluing surfaces coated with raw epoxy.
The strips are coated with thickened epoxy and pressed into place.
Wharram suggests temporarily clamping with nails, but I'm afraid the fir would split and I don't have any drywall screws short enough so I used staples instead.
Once the glue is firmed up I'll scrape out the excess and probably give the unfinished sides their two coats of epoxy.
My little dinghy is getting jealous of all the attention spend on this new bigger boat, so now I'm off to the beach to take her for a quick sail.
The deck and bulkhead supports are made of the 1" x 1/2" fir we ripped earlier. Each one was measured against the bulkhead and then cut to length. Here they all are labeled and ready to go.
I only have the saw horse space (and motivation) to do bulkheads 1, 3 and 6. The bulkheads and fir strips are laid out and the gluing surfaces coated with raw epoxy.
The strips are coated with thickened epoxy and pressed into place.
Wharram suggests temporarily clamping with nails, but I'm afraid the fir would split and I don't have any drywall screws short enough so I used staples instead.
Once the glue is firmed up I'll scrape out the excess and probably give the unfinished sides their two coats of epoxy.
My little dinghy is getting jealous of all the attention spend on this new bigger boat, so now I'm off to the beach to take her for a quick sail.
Saturday, August 20, 2011
Two steps forward, one step back
The day started with a run to the lumber store at 7:30 and ended 12 hours later with all the hull panels and bulkheads cut and lumber sawn to dimension. But in our haste to get as much done as possible we also cut twice as many bulkheads as needed. The extra bulkheads can be salvaged for a lot of small parts, but we'll need at least one more sheet of 4mm ply, maybe two.
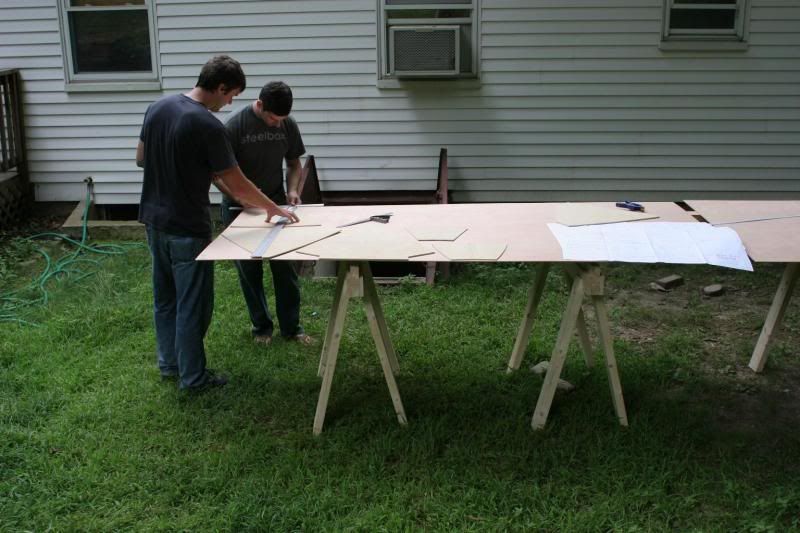
Everything began by laying out two sheets of the 4mm okoume plywood end to end and marking out all the measurements for the front and rear hull panels.
It took some double checking to get the outline and bulkhead locations to all agree, but pretty soon we had a batten through all the marks and could see hulls taking shape.
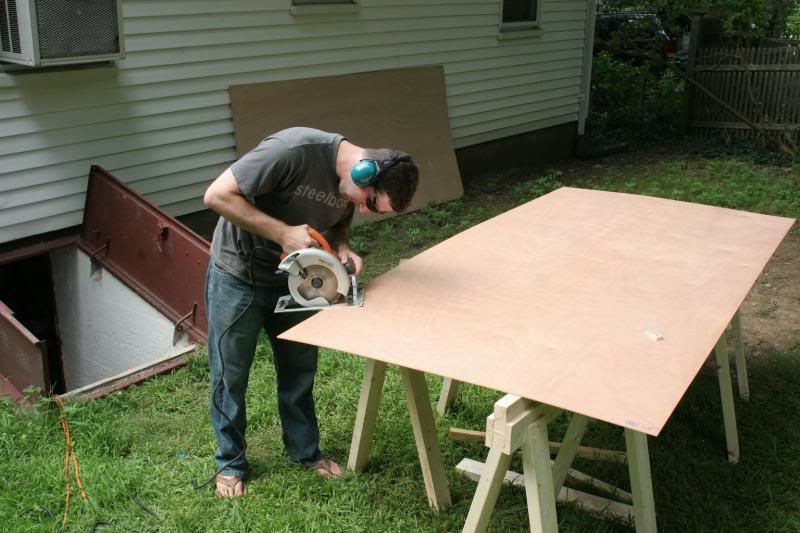
Then it was time to cut out the hull side panels and clean them up to serve as a template for the marking the rest.
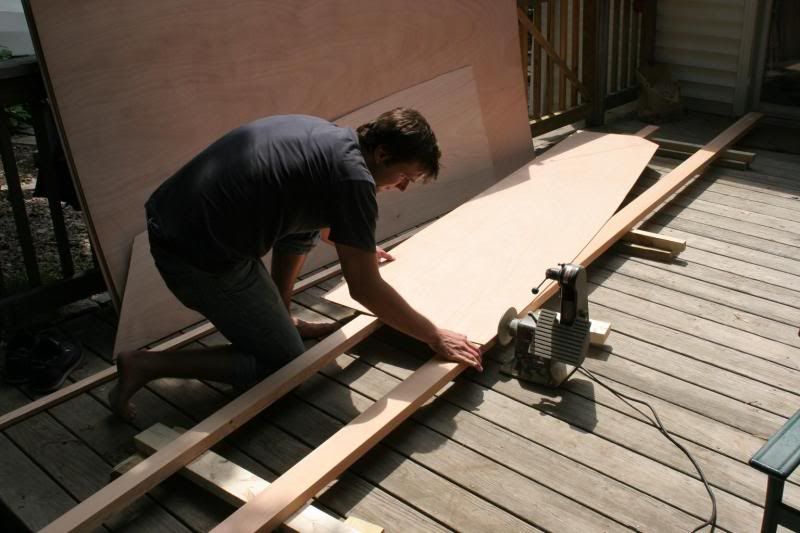
We set up a temporary frame on the deck using the douglas fir boards that would eventually become the keels and stringers to slide the panels by the sander. Once the shape was close we finished by hand with a sanding block right to the pencil lines.
Next we used the first set of hull panels to mark and rough cut the other three pairs. We didn't want to waste any plywood (the irony!) by mixing up which sheet had been used for fore or aft panels so we laid out the bulkhead templates based on the layout guide in the plans and cut them out as well. Unfortunately we marked them out on all eight sheets instead of the four sheets required.
Lesson learned - if it's hot and you're tired and in a hurry to make progress, you're likely to make mistakes. We slowed down substantially after we realized what we had done and made sure to re-consult the plans at every step.
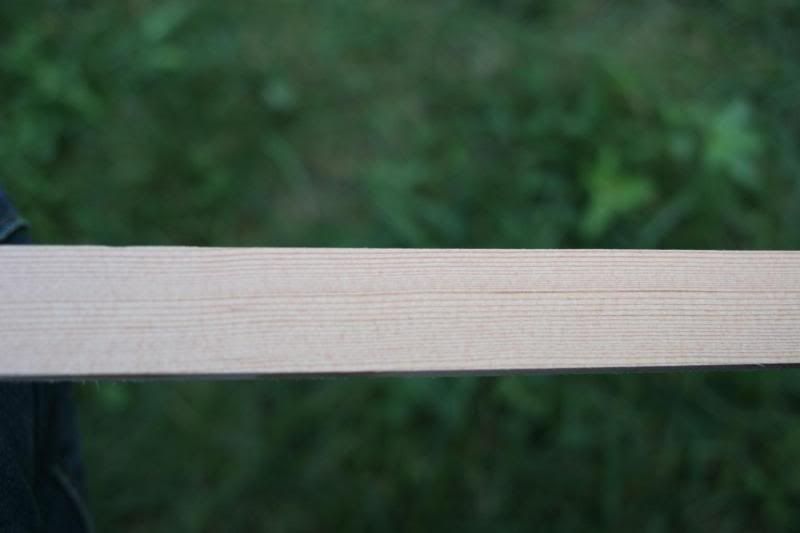
Next we took a break from the plywood and started to re-saw the douglas fir into the 3/4" x 1/2" keels and 1" x 1/2" stringers. Here you can see the grain spacing on a 1" wide strip.
By the time we were done re-sawing it was time to call it a day and to clean up the small mountain of sawdust under the table saw.
Tomorrow all the hull panels will get cleaned up on the router table and then coated in epoxy.
Everything began by laying out two sheets of the 4mm okoume plywood end to end and marking out all the measurements for the front and rear hull panels.
It took some double checking to get the outline and bulkhead locations to all agree, but pretty soon we had a batten through all the marks and could see hulls taking shape.
Then it was time to cut out the hull side panels and clean them up to serve as a template for the marking the rest.
We set up a temporary frame on the deck using the douglas fir boards that would eventually become the keels and stringers to slide the panels by the sander. Once the shape was close we finished by hand with a sanding block right to the pencil lines.
Next we used the first set of hull panels to mark and rough cut the other three pairs. We didn't want to waste any plywood (the irony!) by mixing up which sheet had been used for fore or aft panels so we laid out the bulkhead templates based on the layout guide in the plans and cut them out as well. Unfortunately we marked them out on all eight sheets instead of the four sheets required.
Lesson learned - if it's hot and you're tired and in a hurry to make progress, you're likely to make mistakes. We slowed down substantially after we realized what we had done and made sure to re-consult the plans at every step.
Next we took a break from the plywood and started to re-saw the douglas fir into the 3/4" x 1/2" keels and 1" x 1/2" stringers. Here you can see the grain spacing on a 1" wide strip.
By the time we were done re-sawing it was time to call it a day and to clean up the small mountain of sawdust under the table saw.
Tomorrow all the hull panels will get cleaned up on the router table and then coated in epoxy.
Subscribe to:
Posts (Atom)